Eichler bathroom lighting should preserve visual simplicity while improving mirror visibility, shower illumination, nighttime comfort, and everyday control. A successful plan does not depend on dim bulbs or outdated fixtures to feel period-correct. Instead, it combines restrained fixture forms with modern LEDs, thoughtful placement, and separate lighting layers.
The U.S. Department of Energy’s lighting principles distinguish between ambient, task, and accent lighting, all of which can play a practical role in a bathroom. In an Eichler, those layers should be planned without competing with exposed beams, wood ceilings, wall paneling, or clean architectural lines. Lighting should therefore be coordinated early as part of a complete Eichler home remodeling plan, not selected after the walls and ceilings are finished.
What Makes Bathroom Lighting Feel Appropriate for an Eichler Home?
Eichler-friendly bathroom lighting uses simple forms, controlled glare, warm-to-neutral light, and restrained placement to support the home’s post-and-beam architecture. It references mid-century proportions and materials without requiring an exact reproduction of every original fixture or sacrificing the visibility expected from a modern bathroom.
The Palo Alto Eichler Neighborhood Design Guidelines emphasize the importance of maintaining the defining architectural character of Eichler homes. Inside a bathroom, that principle translates into choosing fixtures that support the architecture rather than turning the room into a themed interpretation of the 1950s.
Preserve Simplicity Rather Than Recreating Every Original Fixture
Period-correct bathroom lighting does not require homeowners to search for vintage fixtures with outdated wiring or inadequate light output. A better approach is to reference original scale, geometry, glass, and finish while using modern light sources and controls.
When you renovate an Eichler home, look for fixtures that feel visually quiet and intentional. Frosted globes, slim cylinders, shallow surface mounts, and simple linear sconces can complement an Eichler without appearing overly nostalgic.
Let the Architecture Remain More Prominent Than the Fixture
Fixtures should not compete with exposed beams, wood ceilings, wall paneling, or a strong vanity composition. Keep the scale proportional to the room and avoid filling every available ceiling area with recessed lights.
Bathrooms with exposed or architecturally sensitive ceilings may benefit from techniques discussed in GMJ Construction’s guide to lighting an Eichler without cutting tongue-and-groove ceilings.
Build the Bathroom Lighting Plan in Functional Layers
One ceiling fixture rarely provides comfortable light for every bathroom activity. A stronger Eichler bathroom lighting plan uses four distinct layers:
- Ambient lighting: Provides general illumination for entering, cleaning, and moving around the room.
- Task lighting: Illuminates the face, mirror, sink, and grooming area.
- Shower lighting: Provides dependable illumination within or immediately around the wet area.
- Night lighting: Identifies the floor, doorway, vanity, and circulation path at a low level.
Separate Ambient, Task, Shower, and Night Lighting
Adding layers does not have to add visual clutter. One understated ceiling fixture, two compact mirror sconces, one carefully placed shower light, and concealed under-vanity lighting may provide more useful illumination than a ceiling filled with downlights.
During an Eichler bathroom remodel, each fixture should have a defined purpose. Avoid adding lights merely to fill space on a plan.
Assign Each Lighting Layer Its Own Control
Place vanity, ambient, shower, and night lighting on separate controls whenever practical. Dimmers can make the room more adaptable, while independent switching prevents homeowners from turning on every light for a short nighttime visit.
Controls should remain understandable. A simple, clearly arranged switch group is usually more useful than an overly complicated automated system.
Choose Vanity Lighting That Illuminates the Face Evenly
The clearest bathroom mirror lighting generally comes from diffused fixtures positioned on both sides of the face. An overhead fixture can add brightness but may create shadows below the eyes, nose, and jaw when used alone.
A practical comparison:
- Side sconces: Usually provide the most balanced facial illumination.
- Over-mirror fixtures: Helpful when wall width is limited, but placement and diffusion matter.
- Integrated mirror lighting: Visually clean, although light quality, serviceability, and brightness should be reviewed before purchase.
Use Side Lighting to Reduce Shadows Around the Eyes and Jaw
Position side sconces close enough to the mirror to illuminate the face rather than the surrounding wall. Their height should relate to the users, mirror dimensions, vanity width, and fixture design instead of following a rigid universal measurement.
Fixtures with frosted or opal diffusers are often more comfortable than exposed bulbs. Before rough electrical work, confirm the mirror width and mark the intended fixture locations on a wall elevation.
Treat Over-Mirror Lighting as a Supplement, Not the Default Solution
An over-mirror light can work well when side sconces would interfere with cabinetry, a medicine cabinet, or a narrow wall. Light direction depends on the fixture. A well-diffused downward fixture may perform better than an exposed upward-facing bulb, while a fixture that distributes light in both directions may soften contrast.
Evaluate the complete fixture rather than choosing based only on whether the bulbs face up or down.
Select Warm, Accurate Light for Skin Tones and Materials
Choose a consistent warm-to-neutral color temperature throughout the bathroom. Many homeowners prefer light in the general 2700K to 3500K range, depending on daylight, tile color, wood tones, and personal preference.
Around the mirror, consider LEDs with strong color rendering, particularly when evaluating skin tones, makeup, paint, tile, or natural wood. Diffusion and glare control are just as important as brightness.
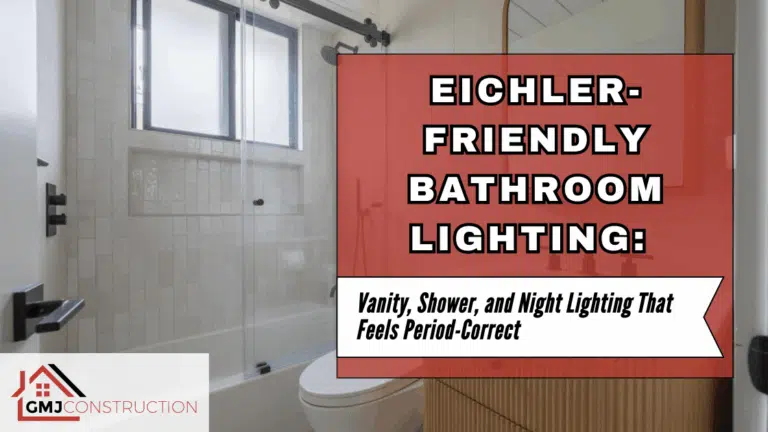
Illuminate the Shower Without Making the Ceiling Feel Busy
A shower needs dependable illumination, but that does not mean the ceiling requires several bright spotlights. One properly selected and placed fixture may be sufficient for a compact shower, while a larger enclosure may require a broader lighting approach.
Use this wet-area lighting checklist:
- Confirm the fixture’s listed rating for its exact location.
- Review exposure to spray, moisture, and condensation.
- Choose a comfortable beam spread or diffused lens.
- Avoid placement that creates glare directly above the user.
- Coordinate the fixture with separate controls and the ceiling assembly.
Use Fixtures Specifically Approved for the Installation Area
Fixture suitability depends on where the light is installed and whether it may be exposed to shower spray. Do not assume that every recessed or enclosed light is appropriate for a shower.
Review the product documentation and have the project electrician confirm the required damp-location or wet-location rating. This should be coordinated with the complete Eichler shower waterproofing and curbless-shower plan.
Favor Diffused or Broad Illumination Over a Harsh Spotlight
A narrow beam placed directly above a person can create strong shadows and uncomfortable glare. Broader or diffused light can illuminate the shower floor, controls, walls, niche, and glass enclosure more evenly.
Reflective tile and clear glass may intensify glare, while darker finishes may require more carefully distributed illumination. Review the fixture location in relation to the showerhead, niche, bench, and entry.
Coordinate Electric Lighting With Skylights and Natural Light
Natural light is one of the defining pleasures of many Eichler interiors, but daylight cannot replace electric shower lighting. A skylight may provide excellent illumination at midday and very little during an early morning, evening, or overcast day.
Plan the electric lighting for the least favorable daylight condition. Skylight, waterproofing, ventilation, and fixture penetrations should also be coordinated rather than designed independently.
Add Night Lighting That Guides Movement Without Waking the Household
Night lighting should be treated as its own layer, not simply as a dimmed version of the main ceiling light. Effective locations include:
- Beneath a wall-mounted or floating vanity
- Near the floor at the bathroom entrance
- Along the route between the doorway, toilet, and sink
Place Low-Level Light Beneath the Vanity or Near the Floor
Concealed under-vanity lighting can reveal the floor plane without shining directly into your eyes. A low wall light can serve a similar purpose when the vanity extends to the floor.
The source should be shielded from normal sightlines. The goal is to identify edges, obstacles, and circulation paths, not illuminate the entire bathroom at full brightness.
Use Dimmers, Sensors, or Separate Nighttime Switching
A motion sensor can activate low-level lighting automatically, but its range, sensitivity, delay, and brightness should be adjustable. Poorly positioned sensors may activate when someone passes the doorway or moves in an adjoining room.
Homeowners who prefer manual control can use a dedicated nighttime switch or preset dimming scene. Automatic lighting should remain a convenience, not an unwanted requirement.
Select Fixtures, Finishes, and Forms That Support the Eichler Interior
A period-sensitive fixture usually has a restrained silhouette and clear relationship to the room’s other materials.
Do: Choose globes, cylinders, slim bars, shallow surface mounts, and simple geometric forms.
Avoid: Ornate scrollwork, oversized decorative fixtures, faux-historic detailing, exposed high-glare bulbs, and fixtures that dominate the wall or ceiling.
Look for Globe, Cylinder, Linear, and Simple Geometric Forms
A frosted globe sconce can reference mid-century design while distributing light comfortably. Cylindrical sconces can frame a rectangular mirror, while a slim linear fixture can work above a wider vanity.
GMJ Construction’s guidance on how to upgrade Eichler lighting without losing the mood offers additional ideas for balancing modern performance with architectural character.
Coordinate Finishes Without Matching Every Metal Exactly
Chrome, nickel, black, brass, painted metal, and glass can all work in an Eichler bathroom when used with restraint. The lighting finish should relate to the faucet, mirror frame, cabinet hardware, and nearby architectural materials.
Exact matching is unnecessary. A controlled palette of two compatible finishes often feels more natural than forcing every metal component to be identical.
Coordinate Lighting With the Electrical and Bathroom Remodel Plans
Lighting decisions should be substantially finalized before rough electrical work begins.
Use this five-step coordination checklist:
- Confirm the vanity, mirror, and medicine-cabinet dimensions.
- Select fixtures and obtain their installation documents.
- Prepare wall elevations and a reflected ceiling plan.
- Assign switches, dimmers, sensors, and lighting zones.
- Review wiring, moisture exposure, ceiling conditions, and energy requirements with the project team.
Finalize Mirror and Vanity Dimensions Before Rough Electrical Work
Late mirror or vanity changes can leave sconces off-center, junction boxes exposed, or fixtures blocked by cabinet doors. Confirm the finished-floor height, backsplash, faucet, mirror, and lighting relationship together.
This is especially important when the vanity is custom-built or the mirror includes integrated storage.
Review Ceiling, Wall, and Retrofit Constraints Early
Eichler homes may have exposed beams, limited ceiling cavities, wood decking, and existing wiring routes that differ from conventional homes. Cutting first and solving the details later can create avoidable architectural disruption.
Review surface-mounted fixtures, wall lighting, indirect lighting, and existing pathways before assuming recessed lighting is the only option.
Verify Moisture, Electrical, and Energy Requirements
Product documentation, current California requirements, local amendments, permit scope, and site conditions can affect the final design. Have the designer, electrician, contractor, and local building department confirm what applies to the specific project.
An older home may also require evaluation of wiring capacity or panel conditions before new loads and controls are added. GMJ Construction discusses related considerations in its guide to upgrading Eichler electrical panels and wiring.
Avoid Bathroom Lighting Choices That Work Against the Eichler Character
Common Lighting Mistakes
- Relying on one bright ceiling fixture
- Placing vanity lights too high or too far from the mirror
- Mixing noticeably different light colors
- Using exposed bulbs that create mirror glare
- Crowding the ceiling with unnecessary recessed lights
- Choosing decorative fixtures that overpower the architecture
- Forgetting a separate nighttime lighting layer
These mistakes can reduce comfort even when the fixtures look attractive individually. Review the lighting as one coordinated system and consider GMJ Construction’s broader list of Eichler remodeling mistakes to avoid before construction begins.
Eichler Bathroom Lighting Questions Homeowners Commonly Ask
What color temperature works best in an Eichler bathroom?
Warm-to-neutral lighting, often around 2700K to 3500K, works well in many Eichler bathrooms. The best selection depends on daylight, tile, wood, paint, and homeowner preference. Keep the color temperature consistent so adjacent fixtures do not appear noticeably yellow, white, or blue.
Are recessed lights appropriate in an Eichler bathroom?
Yes, when used selectively. A restrained recessed fixture can be useful in a shower or another focused area. Filling an exposed wood ceiling with numerous downlights may disrupt its visual rhythm, so surface-mounted, wall-mounted, or indirect alternatives should also be evaluated.
Can modern LED lighting still feel period-correct?
Yes. Period character comes primarily from fixture scale, form, placement, finish, and light quality. Modern LEDs can support an Eichler interior when paired with simple geometric fixtures, warm light, good diffusion, compatible dimming, and controls that remain visually unobtrusive.
Plan a Bathroom Lighting Scheme That Respects Your Eichler
The best Eichler bathroom lighting results come from coordinating the vanity, mirror, shower, finishes, wiring, controls, and architectural conditions before construction begins. GMJ Construction can help integrate period-sensitive lighting into a complete Eichler bathroom remodeling plan or a broader Palo Alto Eichler remodel.
Takeaway: Preserve the architecture, layer the light, control glare, and give each fixture a specific job. Period-correct lighting should make your Eichler bathroom more useful without making the renovation feel visually disconnected from the home.